React Navigation 带自定义按钮的底部导航栏
2019-03-04
前言
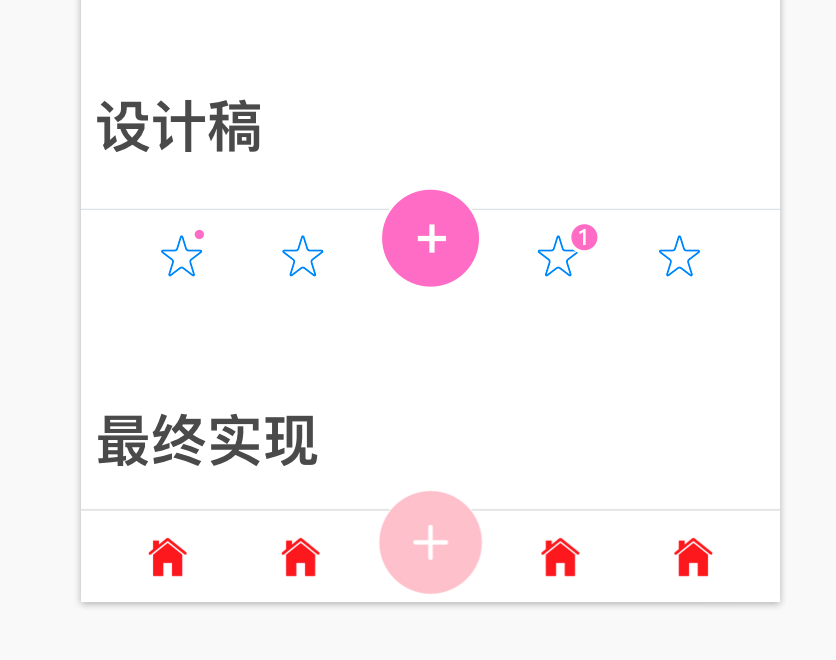
React Navigation 是 React Native 开发中常用的导航库,它默认提供了多种底部导航栏实现。目前流行一种在中间加按钮的样式,需要通过自定义组件来实现,在本文中介绍实现方法。
前面我曾翻译过一篇React Navigation 自定义 Tab Bar(翻译),它偏重于讲解 React Navigation,而本文偏重于讲解布局原理,两篇可以结合起来看。
本文的代码实现位于 GitHub 地址。MaxieeRNLab 是我创建的一个用于展示 React Native 各种功能开发方法的综合性展示项目,除了本文的功能外还包含方方面面的功能演示,欢迎 Star!
首先让我们先看下实现效果:

层次划分
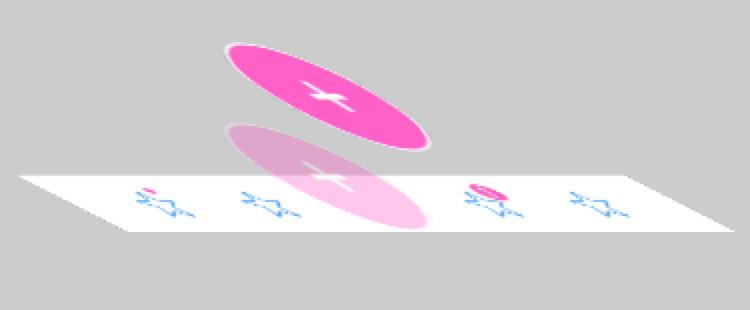
我们先从布局入手,上图中这个最终实现,我们该如何进行布局呢?
首先整体上分为两层:

这样,我们可以使用一个大容器,来装裹这两层:

层次布局实现
如何实现上一节中的层次布局呢?整体的视图结构如下:
<View style={[styles.container, style]}>
    <View style={styles.tabbarContainer}>
        {tabBarButtons}
    </View>
    <View style={styles.circleButton}>
        <Icon name="ios-add"
            size={36}
            color="white"
            />
    </View>
</View>
其中,相关的样式如下:
const styles = StyleSheet.create({
    container: {
        flex: 1,
        justifyContent: 'center',
        alignItems: 'center',
        height: HEIGHT_CIRCLE
    },
    tabbarContainer: {
        position: 'absolute',
        bottom: 0,
        left: 0,
        right: 0,
        borderTopWidth: 0.5,
        height: HEIGHT_TABBAR,
        flex: 1,
        justifyContent: 'space-evenly',
        flexDirection: 'row',
        borderTopColor: "#CCCCCC",
    },
    circleButton: {
        width: HEIGHT_CIRCLE,
        height: HEIGHT_CIRCLE,
        position: 'absolute',
        bottom: 4,
        borderRadius: HEIGHT_CIRCLE/2,
        backgroundColor: 'pink',
        borderWidth: 0.5,
        borderColor: 'white',
        flex: 1,
        justifyContent: 'center',
        alignItems: 'center',
    },
其中:
- container 是总容器
- tabbarContainer 是 Tabbar 容器
- circleButton 是原型按钮容器
- tabbarContainer 和 circleButton 均使用 'absolute' position,来实现在父容器中的摆放
Tab 按钮
在上一节的代码中,tabBarButtons 是一个数组表示 Tab 按钮,本节中我们来看如何创建 Tab 按钮。
实现的代码如下:
const { navigation, style } = this.props;
let tabBarButtons = navigation.state.routes.map(this.renderTabButton.bind(this));

tabBarButtons.splice(2, 0,
    <View key="circle-space"
        style={{
            width: HEIGHT_CIRCLE * 0.8,
        }} />)
其中:
navigation.state.routes表示外界定义的路由表,我们通过 map 操作,将其映射为 Tab 按钮组件(具体按钮创建在 renderTabButton 中,里面都是普通的布局操作,这里不再赘述)- 之后,我们又人为地把圆形视图插入到指定位置,需要注意的是,这里的圆形视图的作用仅仅是占位,圆形按钮实际上是在另一个层次中定义的,这里只是先把空间占据。
这样就完成了对 TabBar 容器的填充。
完整代码实现
本文的代码实现位于 GitHub 地址。
MaxieeRNLab 是我创建的一个用于展示 React Native 各种功能开发方法的综合性展示项目,除了本文的功能外还包含方方面面的功能演示。
这个项目目前刚刚起步当中,我的计划是将我的 React Native 开发技能,都结构化地沉淀到这个项目中。
欢迎 Star!
结论
至此,我们就完成了带自定义按钮的底部导航栏的实现。
可以看出,只要对 React Native 的 FlexBox 布局比较熟悉,并且稍微看一下 React Navigation 提供的 API,就能很方便地将它实现。